In Exercise 1 we blinked the Uno’s built-in LED with zero wiring. This exercise takes the next real step: building your first circuit on a breadboard and blinking an external LED through a resistor — the same loop you already know, now with real wiring and real Ohm’s law behind it.
Full write-up coming soon
We’re finishing the step-by-step walkthrough, wiring diagram, and real breadboard photos for this one — check back soon, or follow along with Paul McWhorter’s “Arduino Tutorial 3: Understanding How Breadboards Work” in the meantime.
Every Arduino journey starts the same way: no breadboard, no wires, no external parts. Just the board, a USB cable, and one blinking light. This is the “hello world” of electronics — the first thing every beginner builds.
The LED is already on the board
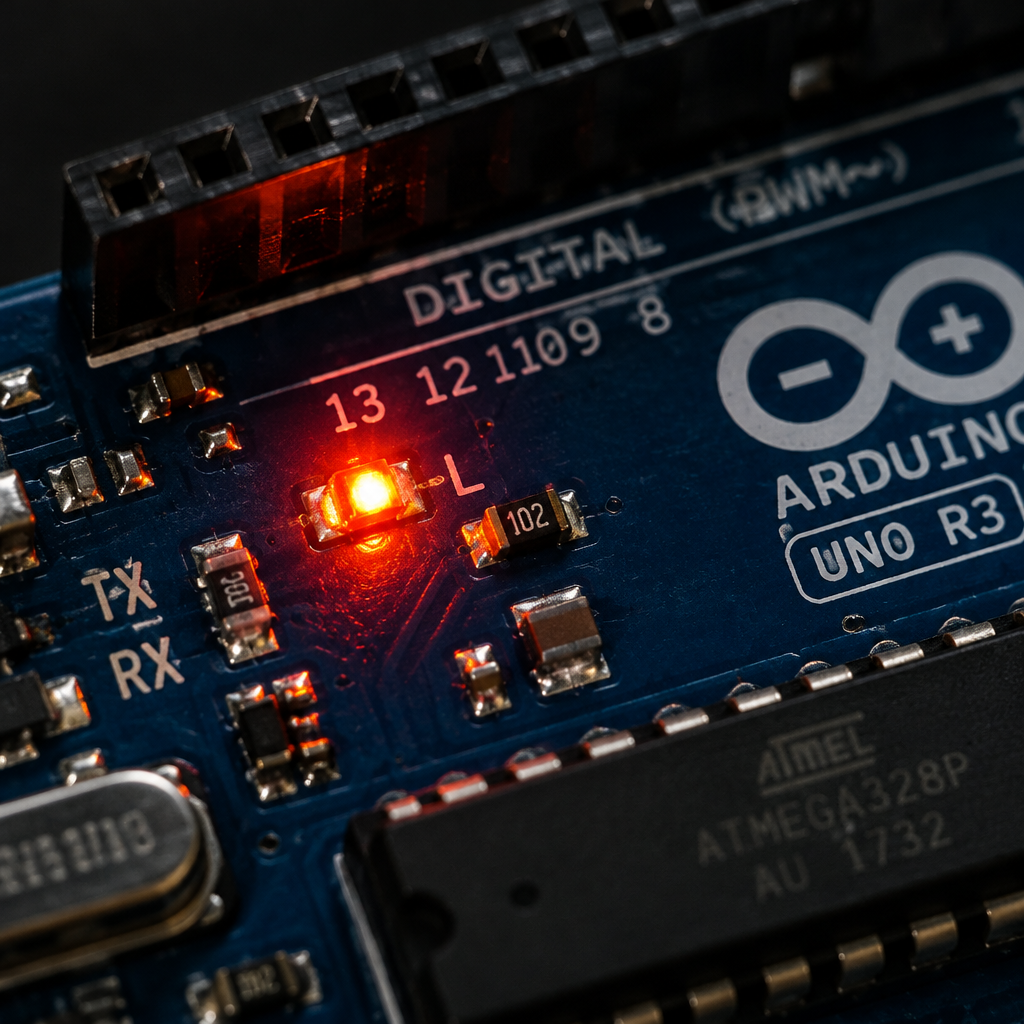
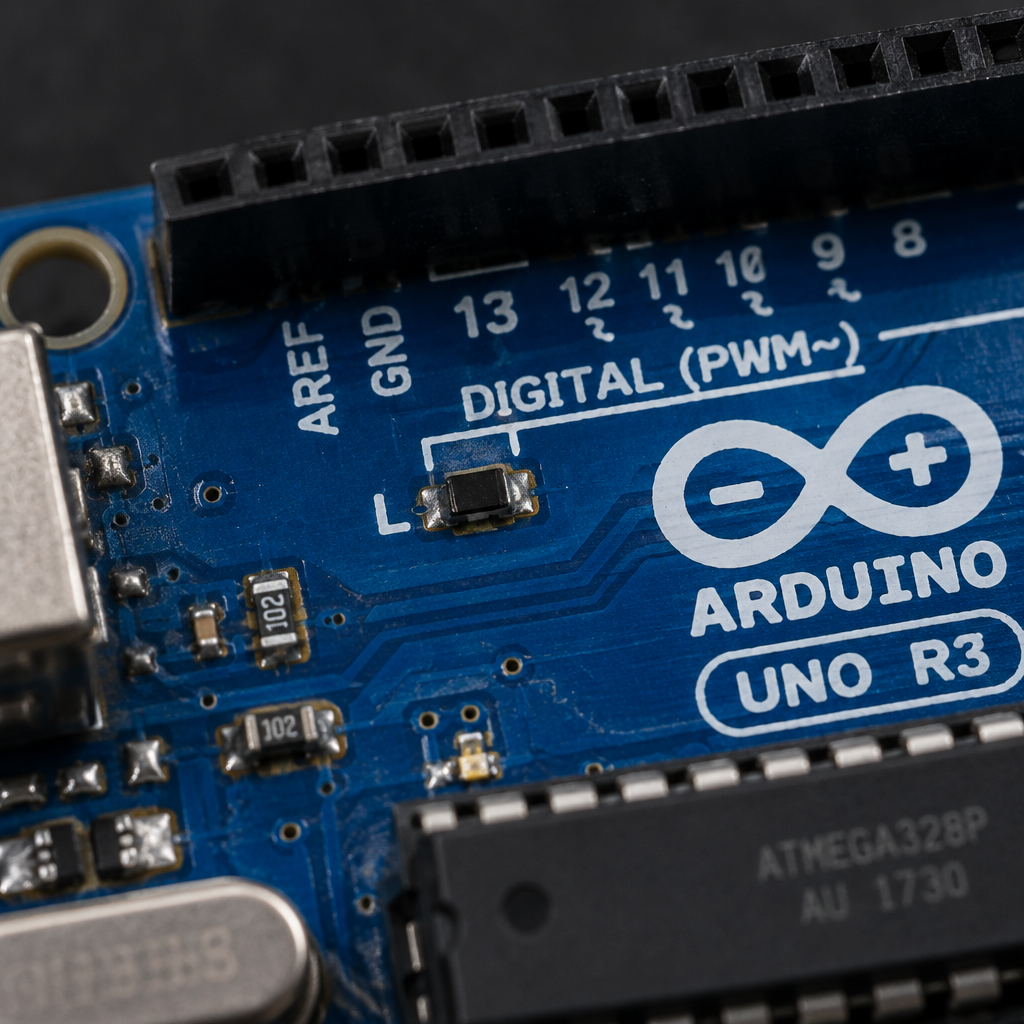
Look closely at your Arduino Uno and you’ll spot a tiny LED labeled “L” sitting right next to pin 13. It’s wired permanently to that pin, which means you can control it with code alone — no circuit building required.
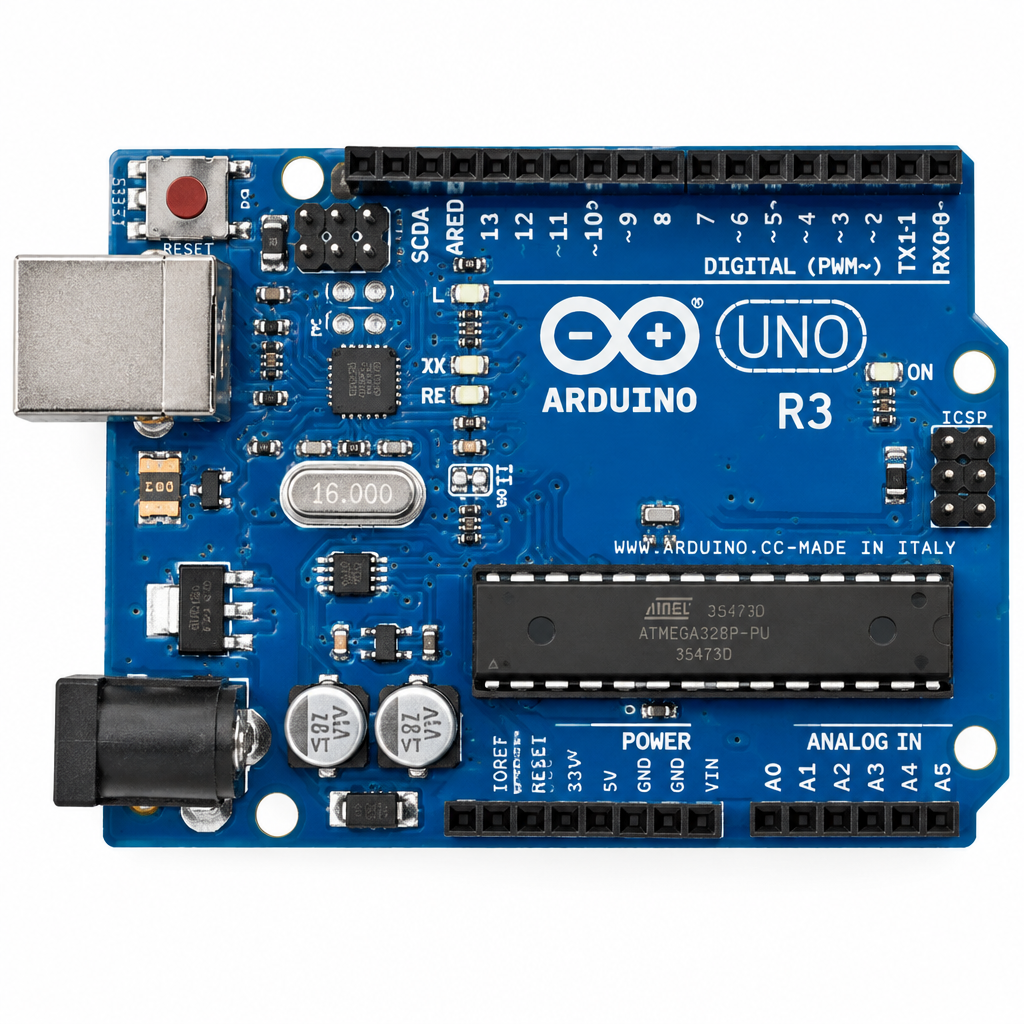
The Arduino Uno R3 — the only part this project needsLED ON — digitalWrite(LED_BUILTIN, HIGH)LED OFF — digitalWrite(LED_BUILTIN, LOW)
The code
Open the Arduino IDE, paste this in, and you’re ready to upload:
LED_BUILTIN is a built-in shortcut that always points to the correct onboard LED pin — on an Uno, that’s pin 13. pinMode tells the board that pin is an output. The loop then turns it on, waits one second, turns it off, waits one second, and repeats forever.
Upload it
Plug in your Uno via USB
Select Tools > Board > Arduino Uno
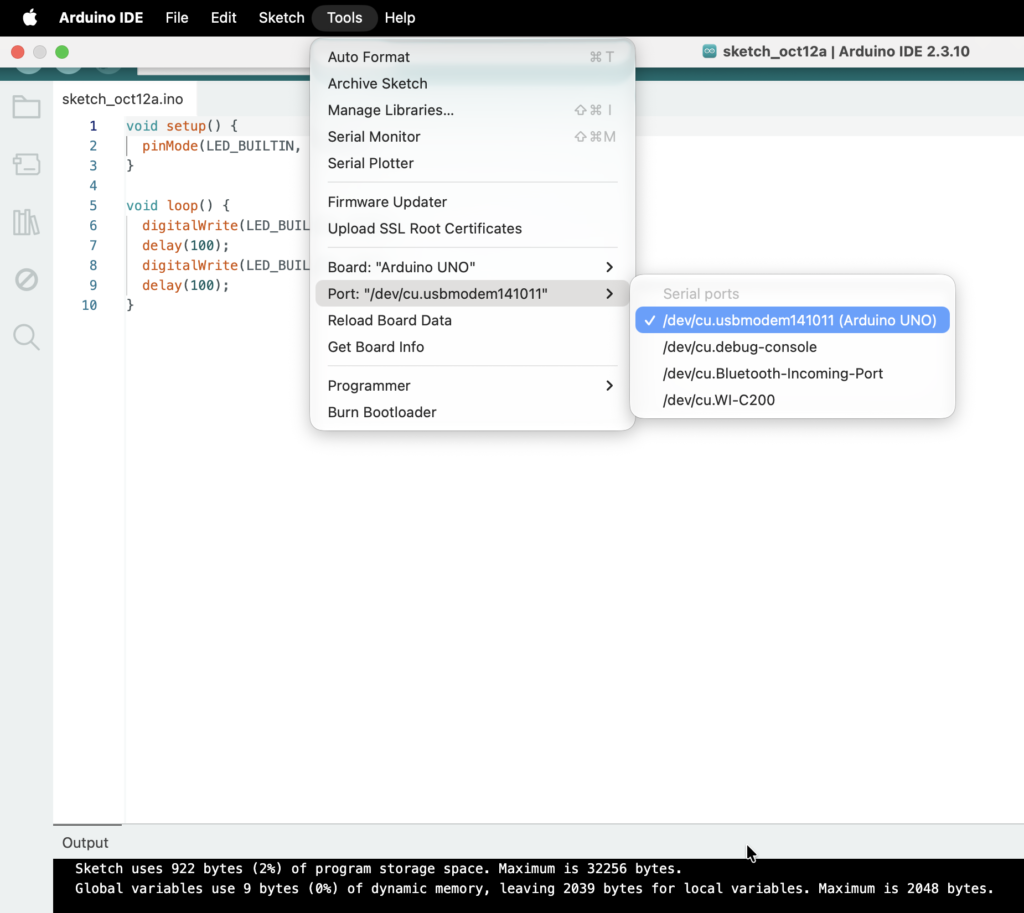
Select Tools > Port and pick your board’s port
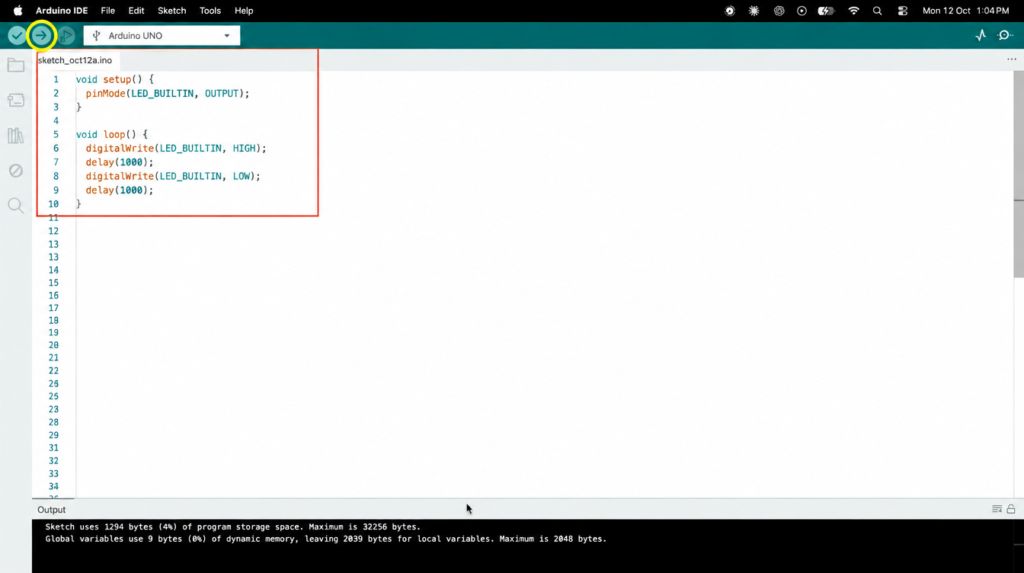
Click Upload (the arrow icon in the toolbar)
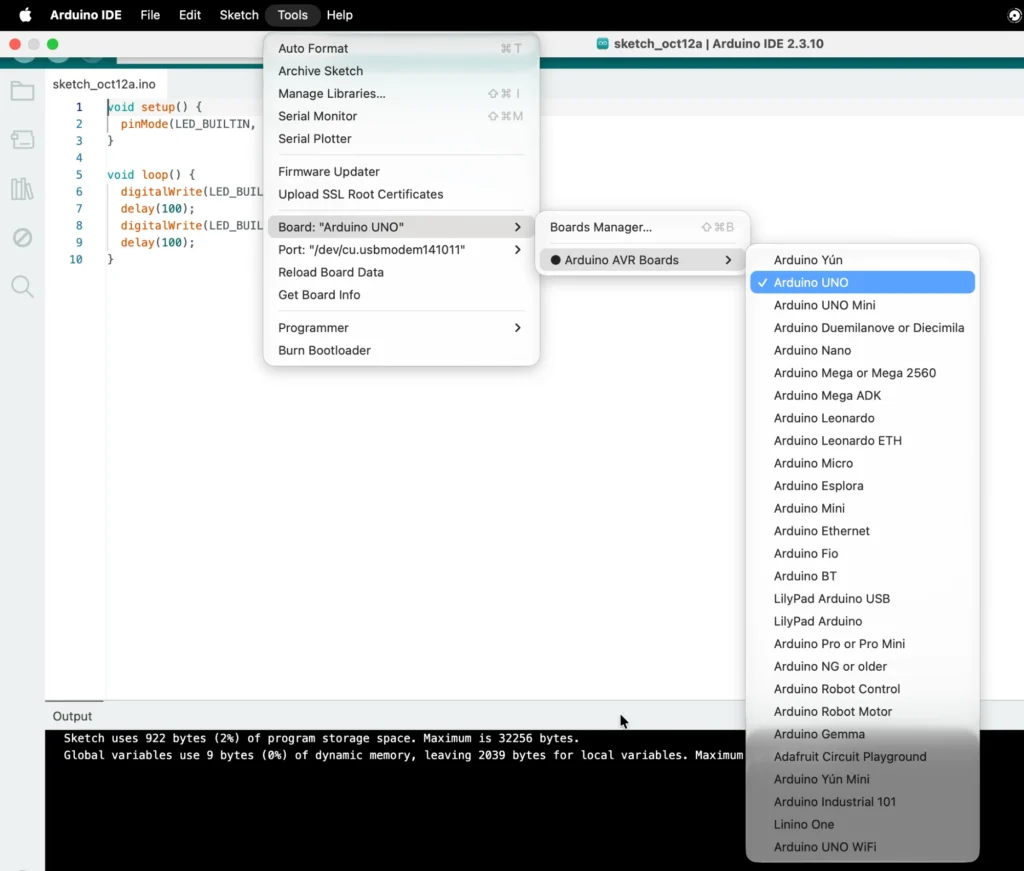
1. Select your board
Go to Tools > Board > Arduino AVR Boards, then choose Arduino Uno. This tells the IDE which chip to compile for — pick the wrong board and the upload will fail or behave oddly.
Tools > Board > Arduino AVR Boards > Arduino Uno
2. Select the port
Go to Tools > Port and pick the port your Uno is connected to — it’s usually labeled with “usbmodem” or “usbserial” and often shows “(Arduino Uno)” right next to it, like in the screenshot below.
Tools > Port — pick the one marked (Arduino Uno)
3. Paste the code, then click Upload
Open the Arduino IDE, select all the default placeholder code, and paste in the sketch from above. The checkmark icon compiles your code (good to catch typos early); the arrow icon next to it — circled below — uploads it to the board.
The yellow circle marks the Upload button in the toolbar
Within a few seconds, the “L” LED on your board should start blinking once per second. If it does — congratulations, you just wrote and ran your first Arduino program.
If the upload fails
On Mac, clone Uno boards often need a USB driver installed before the port even shows up in the Tools menu — that’s a separate, very common issue and not something wrong with this code.
That’s lesson one. Every project we build at Volt Vidya — from a line-follower robot to a remote-control car — starts from this exact same loop: pinMode, digitalWrite, delay. Once this blinks, you’re ready for the next step.
In this course
Exercise 1: Blink the Built-In LED (No Wiring Needed) — you are here